
Simple Storage Service, or S3 for short, from AWS, provides industry-leading scalability, data availability, security, and performance. We can use S3 to store, retrieve and manage any amount of data, such as websites, mobile applications, backup, and much more.
I needed a tool to access and manage my files on Amazon S3, and I decided to build it and here is what have built.
Amazon S3 lingo
To understand how the S3 works, I have to tell you about its lingo first:
Object
An object is a file and metadata that describes the file.
Bucket
A Bucket is a container for objects.
Keys
A Key, or object key, is the unique identifier for an object inside a bucket.
Versioning
We use S3 Versioning to keep multiple variants of an object in the same bucket. Versioning allows us to retrieve, preserve and restore every version of a stored object from its bucket.
Versioning becomes priceless when you need an object lost due to unintended user actions or application malfunctions.
Version ID
If we activate the Versioning in a bucket, S3 generates a unique ID for each object within the bucket. Existing objects will have a null ID, but changes to an existing object will generate a unique ID.
Bucket Policy
A bucket policy indicates who and how can access a bucket and its objects. We define policies by using Amazon IAM (Identity and Access Management).
S3 Access points
Amazon S3 Access Points are endpoints with dedicated access policies that describe how data can be accessed using that endpoint.
Regions
A region identifies the geographical AWS Region where you want Amazon S3 to store your buckets.
Create a Bucket
Let’s start by creating a bucket. Sign in to your AWS account, and from the services, select S3:

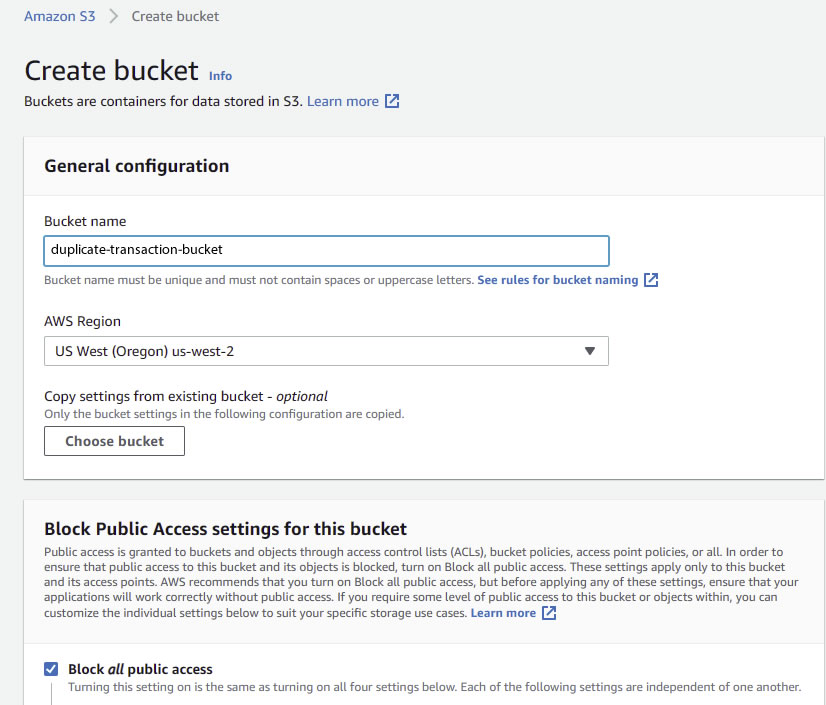
Give your bucket a unique name. I called mine duplicate-transaction-bucket.

You don’t have to enable Versioning for this project, but if you want to enable it, that’s also fine.
Setup the IAM
Now we have to grant access to our bucket, and to do so, and we use IAM.
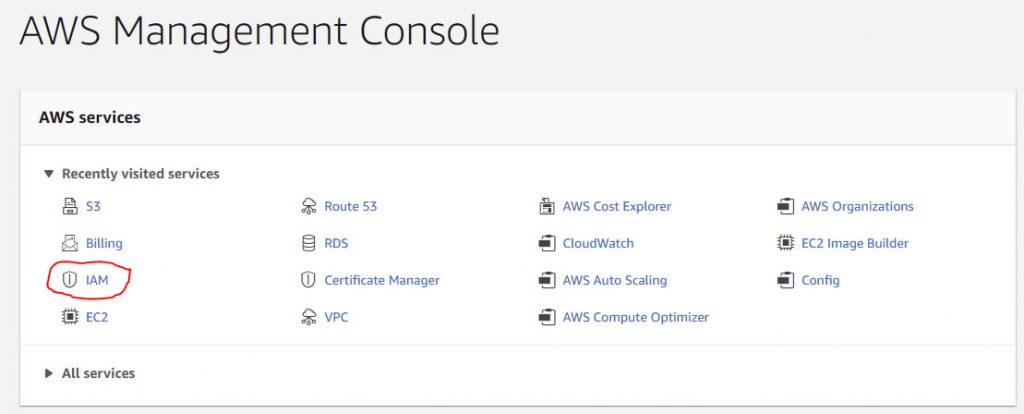
Go back to the AWS services list and this time chooses IAM:
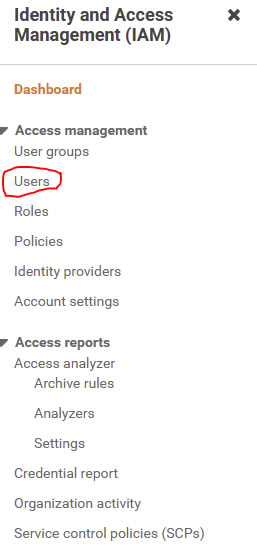
We start by creating a new user. Select Users from the menu:
If you have other users, you will see a list of your current users. Click on the Add users button:

Enter a valid user name and make sure to check the Access key – Programmatic access option. Because we will use AWS SDK, we choose this option for the SDK, AWS API, and other development tools.
Setup the password and choose the Require password reset.

Click on the Next: Permissions to proceed.
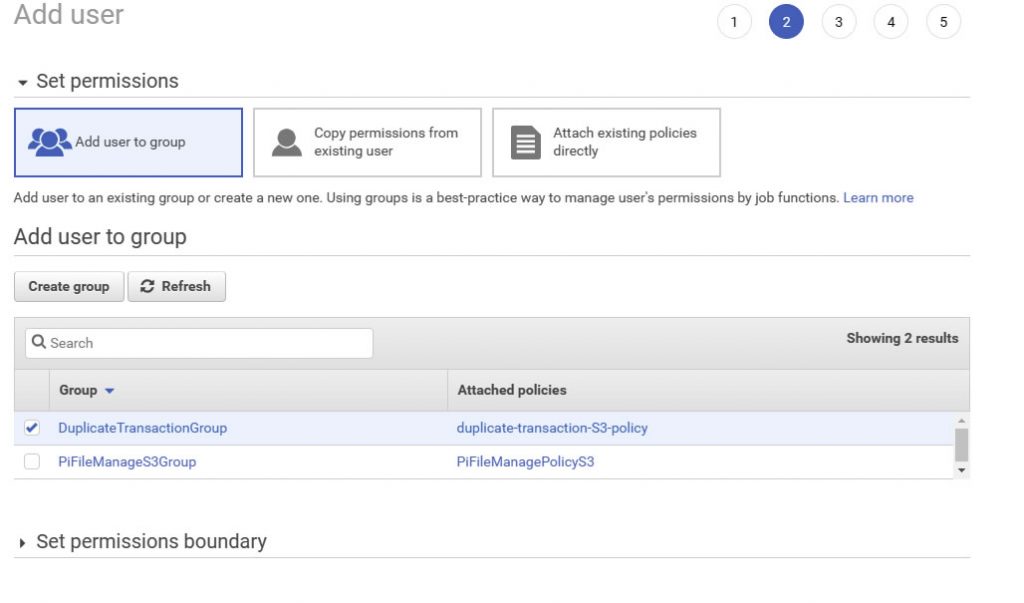
Under the Set Permissions, you have options to add your user to a group, or copy permissions from another user, or attach existing policies directly to the user.
We continue by selecting Create group:

Assign a meaningful name to your group and click on the Create group button:

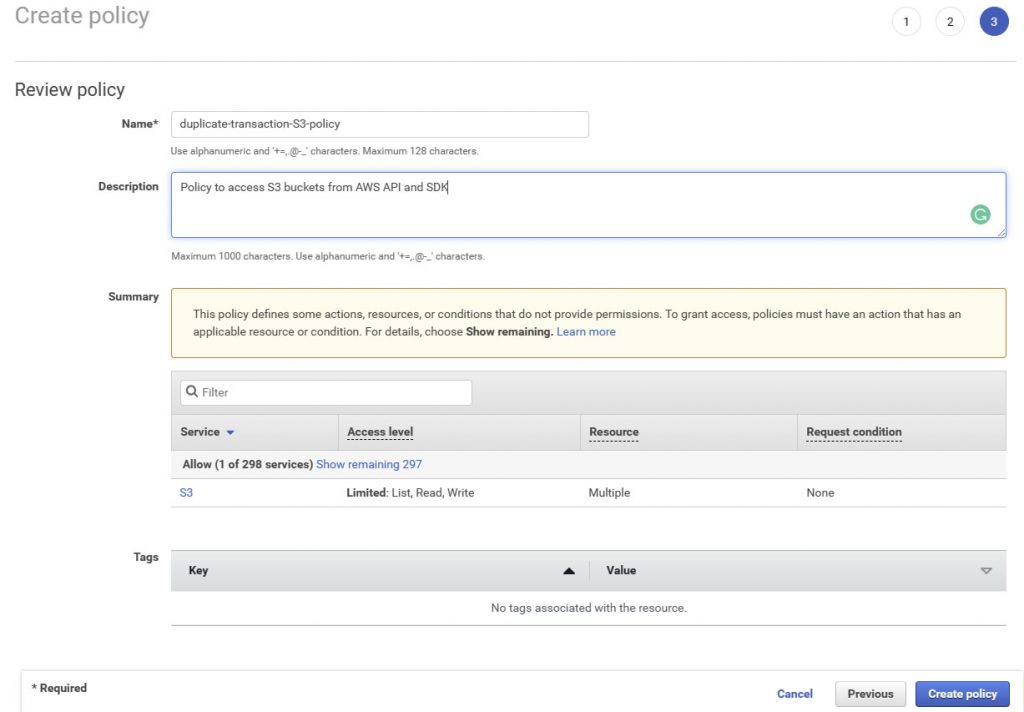
In the next step, we attach a few policies to our newly created group. We will use Create policy because there is no pre-defined permission policy to restrict the IAM user to the new bucket.
Select the JSON tab and copy the following JSON and paste it:
{
  "Version": "2012-10-17",
  "Statement": [
  {
    "Effect": "Allow",
    "Action": [
    "s3:ListAllMyBuckets"
     ],
     "Resource": "arn:aws:s3:::*"
  },
  {
   "Effect": "Allow",
   "Action": [
   "s3:ListBucket",
   "s3:GetBucketLocation"
   ],
   "Resource": "arn:aws:s3:::duplicate-transaction-bucket"
  },
  {
   "Effect": "Allow",
   "Action": [
   "s3:PutObject",
   "s3:GetObject",
   "s3:DeleteObject"
   ],
   "Resource": "arn:aws:s3:::duplicate-transaction-bucket/*"
   }
  ]
}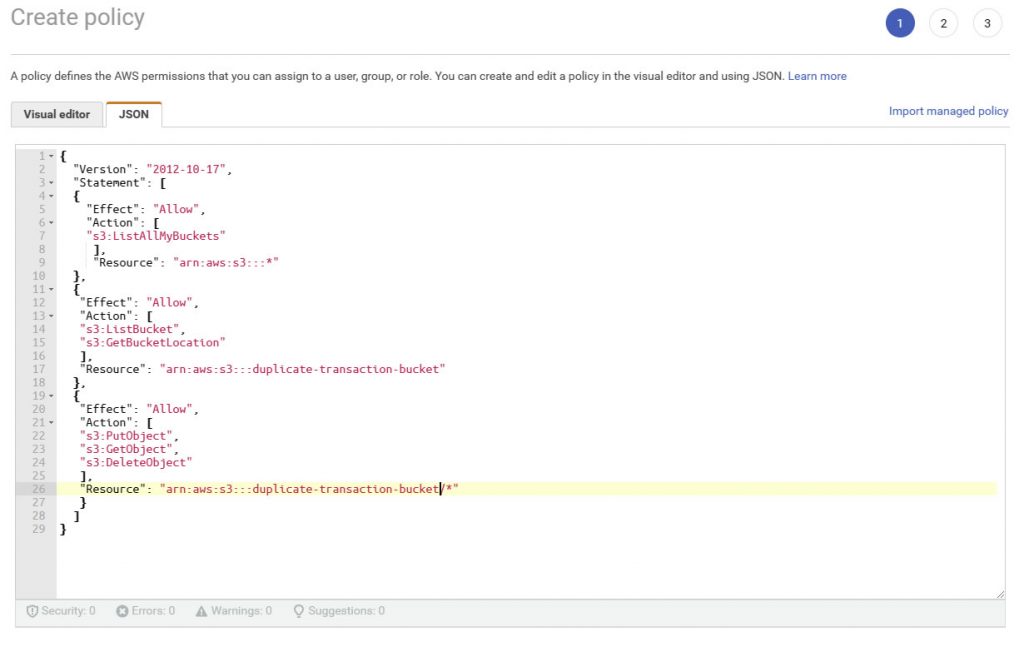
Don’t forget to replace duplicate-transaction-bucket with your bucket name.
Click on the Next: Tags. We are not going to add any tags.
Click on the Next: Review to review and give your policy a name, and I strongly recommend adding a short description.
Attach the newly added policy to the group:

Assign the user to the group:
Once the user is created, you will see the button to download the user credentials. Download and store the CSV file that contains your credentials:

Now, we are ready to get on with our C# programming.
S3 Management in C#
With AWS S3 objects ready and with proper AWS API and SDK credentials, we can start our work to build an app in C# to manage S3 objects.
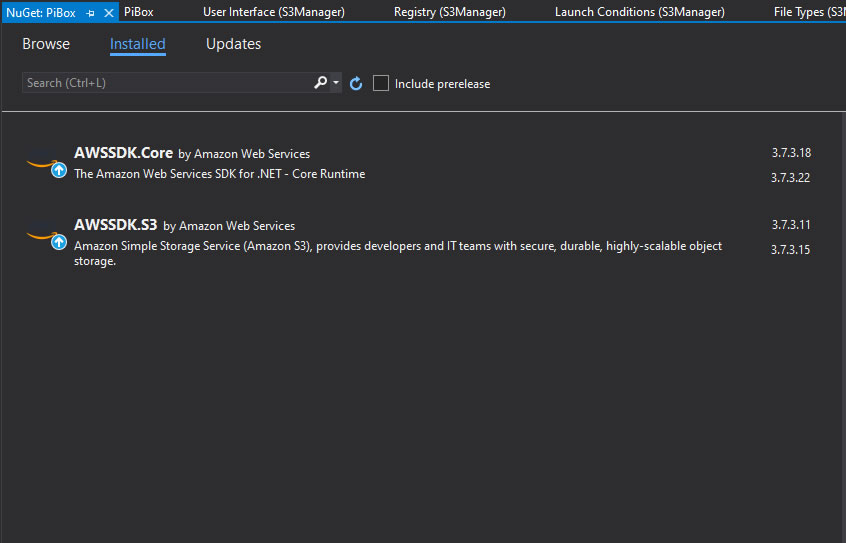
We start by adding AWS SDK to our project from the Nuget repository:
To maintain our objects and perform the download, upload, and delete, I have created separated classes:
S3BucketDelete: To delete objects (files and folders)
public class S3BucketDelete
	{
        public string bucketName { get; set; }
        public string fileName { get; set; }
        public string filePath { get; set; }

        public void DeleteFile()
        {
			try
			{
                var client = new AmazonS3Client(Amazon.RegionEndpoint.USWest2);

                DeleteObjectRequest delRequest = new DeleteObjectRequest
                {
                    BucketName = bucketName,
                    Key = Path.Combine(filePath, fileName)  // Delete file at the path
                };

                DeleteObjectResponse response = client.DeleteObject(delRequest);
            }catch(Exception x)
			{
                MessageBox.Show(x.Message);
			}
        }
        public void DeleteFolder()
        {
            var client = new AmazonS3Client(Amazon.RegionEndpoint.USWest2);

            DeleteObjectRequest delRequest = new DeleteObjectRequest
            {
                BucketName = bucketName,
                Key = Path.Combine(filePath, fileName) + "/" // Delete folder
            };

            DeleteObjectResponse response = client.DeleteObject(delRequest);
        }


}S3BucketDownload: To download objects into local destinations from the AWS S3
public class S3BucketDownload
	{
		public string bucketName { get; set; }
        public string keyName { get; set; }
		public string filePath { get; set; }
		public string fileDestination { get; set; }
        public async Task DownoadFileAsync()
        {
            try
            {
                var client = new AmazonS3Client(Amazon.RegionEndpoint.USWest2);
                var fileTransferUtility = new TransferUtility(client);

                var request = new TransferUtilityDownloadRequest
                {
                    BucketName = bucketName,
                    FilePath = Path.Combine(filePath, keyName),
                  //  Key = Path.Combine(fileDestination, keyName),
                    Key = fileDestination+keyName,
                    //PartSize = 6291456, // 6 MB.
                    //ServerSideEncryptionMethod = ServerSideEncryptionMethod.AES256
                };

                await fileTransferUtility.DownloadAsync(request);
            }
            catch (AmazonS3Exception s3Exception)
            {
                MessageBox.Show(s3Exception.Message, "Error 102", MessageBoxButtons.OK, MessageBoxIcon.Error);
            }
            catch (Exception ex)
            {
                MessageBox.Show(ex.Message, "Error 103", MessageBoxButtons.OK, MessageBoxIcon.Error);
            }
        }
    }
S3BucketUpload: To upload files from the location sources into our S3
public class S3BucketUploader
	{
        public string bucketName { get; set; }
        public string keyName { get; set; }
        public string filePath { get; set; }
        public string fileDestination { get; set; }

        public void UploadFile()
        {
          try
			{
                var client = new AmazonS3Client(Amazon.RegionEndpoint.USWest2);

                PutObjectRequest putRequest = new PutObjectRequest
                {
                    BucketName = bucketName,
                    Key = keyName,
                    FilePath = filePath,
                    ContentType = "text/plain"
                };

                PutObjectResponse response = client.PutObject(putRequest);
            }
            catch (Exception x)
            {
                MessageBox.Show(x.Message, "Error 101", MessageBoxButtons.OK, MessageBoxIcon.Error);
            }
        }
        public void UploadFileToFolder()
        {
			try
			{
                var client = new AmazonS3Client(Amazon.RegionEndpoint.USWest2);

                PutObjectRequest putRequest = new PutObjectRequest
                {
                    BucketName = bucketName,
                    Key = Path.Combine(fileDestination, keyName),
                    FilePath = filePath,
                    ContentType = "text/plain"
                };

                PutObjectResponse response = client.PutObject(putRequest);
            }catch(Exception x)
			{
                MessageBox.Show(x.Message, "Error 100", MessageBoxButtons.OK, MessageBoxIcon.Error);
            }
        }
        public  async Task UploadFileAsync()
        {
            try
            {
                var client = new AmazonS3Client(Amazon.RegionEndpoint.USWest2);
                var fileTransferUtility = new TransferUtility(client);

                var request = new TransferUtilityUploadRequest
                {
                    BucketName = bucketName,
                    FilePath = filePath,
                    Key = Path.Combine(fileDestination, keyName),
                    PartSize = 6291456, // 6 MB.
                    ServerSideEncryptionMethod = ServerSideEncryptionMethod.AES256
                };

                await fileTransferUtility.UploadAsync(request);
            }
            catch (AmazonS3Exception s3Exception)
            {
                MessageBox.Show(s3Exception.Message, "Error 102", MessageBoxButtons.OK, MessageBoxIcon.Error);
            }
            catch (Exception ex)
            {
                MessageBox.Show(ex.Message, "Error 103", MessageBoxButtons.OK, MessageBoxIcon.Error);
            }
        }
    }
S3BucketView: To view objects (files and folders) in S3
public class S3BucketView
{
public string bucketName { get; set; }
public ListObjectsResponse ListFolders()
{
//var client = new AmazonS3Client(Amazon.RegionEndpoint.USWest2);
ListObjectsResponse response;
ListObjectsResponse result ;
IAmazonS3 client;
try
{
using (client = new AmazonS3Client(Amazon.RegionEndpoint.USWest2))
{
ListObjectsRequest listRequest = new ListObjectsRequest
{
BucketName = bucketName,
};
do
{
response = client.ListObjects(listRequest);
IEnumerable<S3Object> folders = response.S3Objects.Where(x => x.Key.EndsWith(@"/") && x.Size == 0);
result = new ListObjectsResponse();
foreach (S3Object x in folders)
{
result.S3Objects.Add(x);
}
if (response.IsTruncated)
{
listRequest.Marker = response.NextMarker;
}
else
{
listRequest = null;
}
} while (listRequest != null);
}
}catch (Exception x)
{
MessageBox.Show(x.Message, "Erorr 1");
result = null;
}
return result;
}
public S3DirectoryInfo ListFiles(string folder)
{
var client = new AmazonS3Client(Amazon.RegionEndpoint.USWest2);
var dir = new S3DirectoryInfo(client, bucketName, folder);
ListObjectsRequest listRequest = new ListObjectsRequest
{
BucketName = bucketName,
Prefix = folder
};
return dir;
}
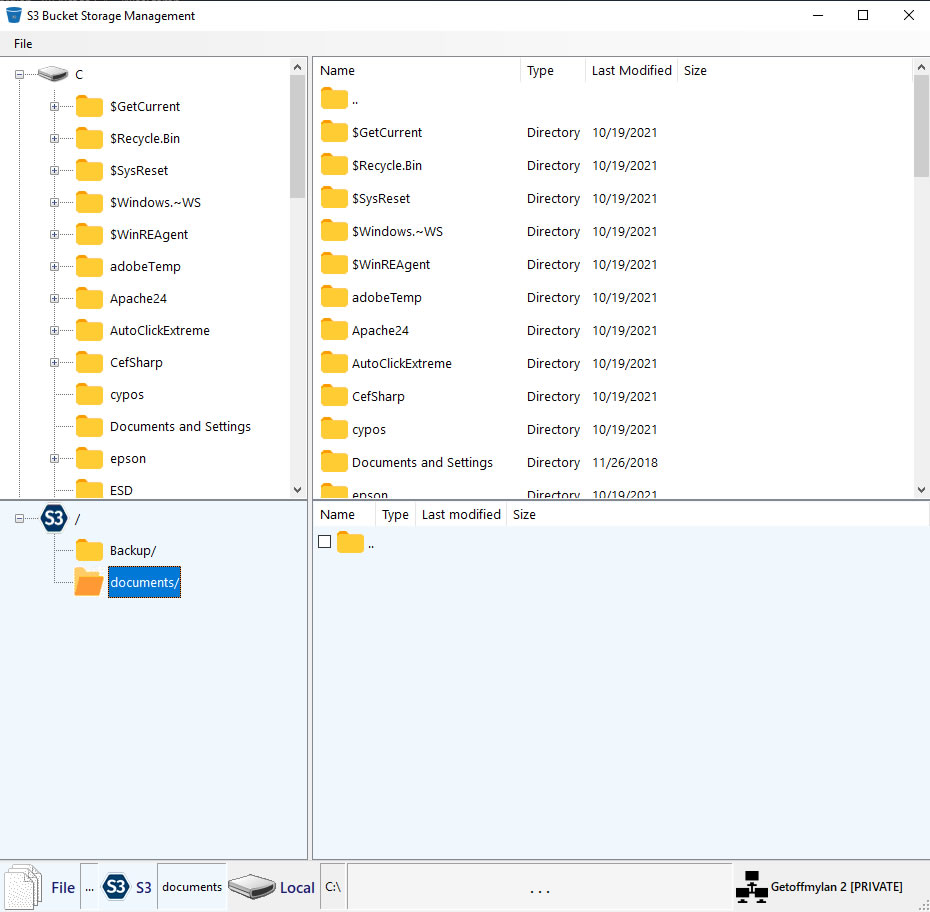
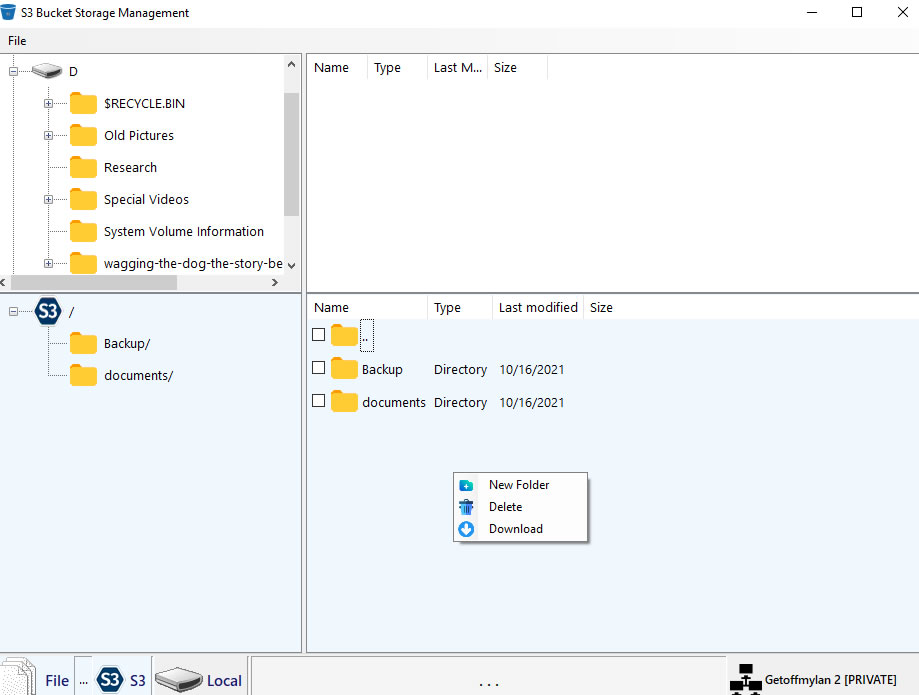
}Both local and remote files and folders are listed in listView and treeView objects. So, you can browse.
The project’s app.config file is where we need to place our credentials to access the S3 objects so that AWS SDK can access them:
 <appSettings>
    <add key="AWSProfileName" value="Username"/>
    <add key="AWSAccessKey" value="Access Key"/>
    <add key="AWSSecretKey" value="Secret Key"/>
  </appSettings>
In addition to this, I have defined another property to store the bucket name.

As soon as the app is launched, we prepare the files:
		public PiBucket()
		{
			InitializeComponent();
			PopulateTreeView();
			PopulateS3Tree();
		}
Two ContextMenuStrip controls provide shortcuts to perform our functions:
I have also added StatusBar and placed StatusLabels to show the selected file, current local path, S3 object address, and network status label.

To remove objects from the S3 folders, you have to check the item checkbox, and after the right-click, select the Delete option.
The Settings
I wanted this project to be as customizable as possible, so I decided to add the Settings screen so that I can switch between different AWS accounts and S3 objects:

As you can see, the Settings form provides two methods to store and restore the app settings values from the app.config file.
private void ShowValues()
		{
			try
			{
				textProfile.Text = ConfigurationManager.AppSettings.Get("AWSProfileName");
				textAccess.Text = ConfigurationManager.AppSettings.Get("AWSAccessKey");
				textSecret.Text = ConfigurationManager.AppSettings.Get("AWSSecretKey");
				textBucket.Text = Properties.Settings.Default.bucket;
			}
			catch (Exception x)
			{
				MessageBox.Show(x.Message, "Error 23", MessageBoxButtons.OK, MessageBoxIcon.Error);
			}
		}
And this method saves the changes to the app.config:
private void StoreValues()
		{
			try
			{
				if (!string.IsNullOrEmpty(textAccess.Text) && !string.IsNullOrEmpty(textBucket.Text) && !string.IsNullOrEmpty(textSecret.Text) && !string.IsNullOrEmpty(textProfile.Text))
				{
					Setconfig.UpdateAppSettings("AWSProfileName", textProfile.Text);
					Setconfig.UpdateAppSettings("AWSAccessKey", textAccess.Text);
					Setconfig.UpdateAppSettings("AWSSecretKey", textSecret.Text);
					Properties.Settings.Default.bucket = textBucket.Text;
					Properties.Settings.Default.Save();
					MessageBox.Show("Restart the software for the changes to take effect.", "Setting", MessageBoxButtons.OK, MessageBoxIcon.Information);
				}
			}catch(Exception x)
			{
				MessageBox.Show(x.Message, "Error 33", MessageBoxButtons.OK, MessageBoxIcon.Error);
			}
		}
Once you figure out how everything works, you will improve this code and build your own.
I wrote this code in a few hours, and I’m sure it has plenty of room to improve.
I have shared this code on github: