If you have ever built software for touchscreen devices, you know that having an onscreen keyboard is an essential component.
Windows comes with an Onscreen keyboard as one of its built-in Ease of Access tools.
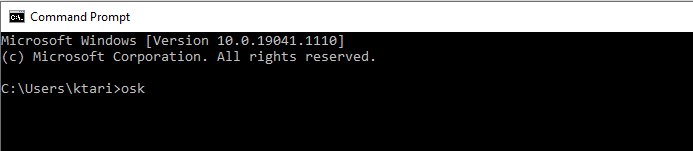
You can launch Windows OSK by sending the osk.exe command from the Windows command line.
Windows OSK looks like this:
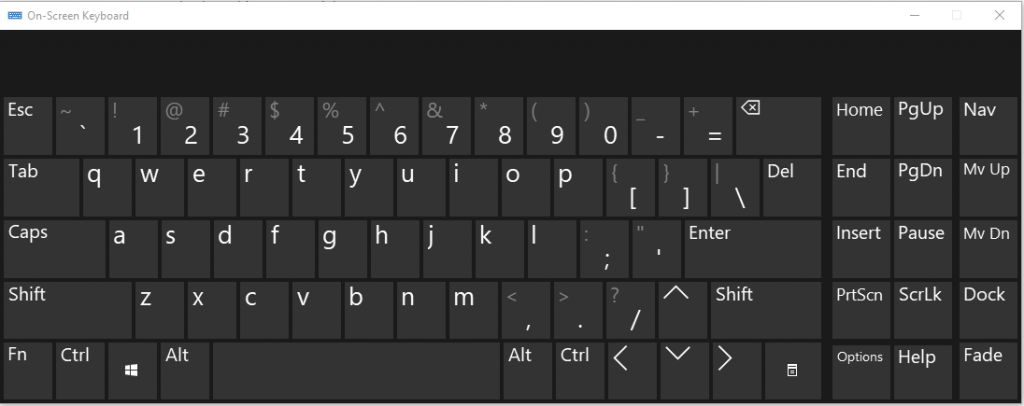
You don’t need a touchscreen to use the OSK. It displays a visual keyboard with all the standard keys, so you can use your mouse or another pointing device to select keys.
If you are using a touchscreen PC, the touch keyboard will appear when you tap inside a text box while your PC is in tablet mode.
Windows OSK is a solution, but you don’t have much control over its functions and behavior, let alone building new tasks to it!
I had built onscreen keyboards for several software applications, but I had never made one full-fledged keyboard with 101+ keys.
So, I decided to tackle this project and build my onscreen keyboard. In this article, I have shared my approach and the source code, so you will have a starting point if you wish to continue.
The Key Method
The “key” to build your Onscreen Keyboard, is to use SendKeys. Send method:
SendKeys.Send(string)This method sends keystrokes to the active application
For example, if you want to click a button and send the TAB keystroke, you use the following method:
SendKeys.Send("{TAB}");If your request does not represent valid keystrokes, you will get an ArgumentException in your code.
Notes
1- Sometimes, you need to send more than one character to get a specific key.
For example, to specify the open parentheses sign, use “{{}”.
SendKeys.Send("{}}");2- The plus sign (+), caret (^), percent sign (%), tilde (~), and parentheses () have special meanings to SendKeys. To specify one of these characters, enclose it within braces ({}).
3- To specify characters that aren’t displayed when you press a key, such as ENTER or TAB, and keys that represent actions rather than characters, you must use specific codes.
For example :
SendKeys.Send("{MULTIPLY}"); The Multiply key on the number keypad
SendKeys.Send("{ADD}"); The Add key on the number keypad
3- To represent more than one character, append each additional character to the one preceding it. To represent the letters A, B, and C, specify the parameter as “ABC”.
SendKeys.Send("ABC");4- To send Shift plus other keys use the plus sign in the following format:
SendKeys.Send("+({F10})"); //Shift + F10Handling SHIFT, CTRL and ALT
Combination keys, such as CTRL + Key, SHIFT + Key, and ALT + Key, are possible by using caret (^), plus(+), and percent sign (%).
SendKeys.Send("^({F10})");  //CTRL + F10
SendKeys.Send("+({F10})");  //Shift + F10
SendKeys.Send("%({F10})");  //ALT + F10
To specify to hold down CTRL while S is pressed, followed by D without SHIFT, use “^SD”.
to specify to hold down SHIFT and press A and B, use “+(AB)”.
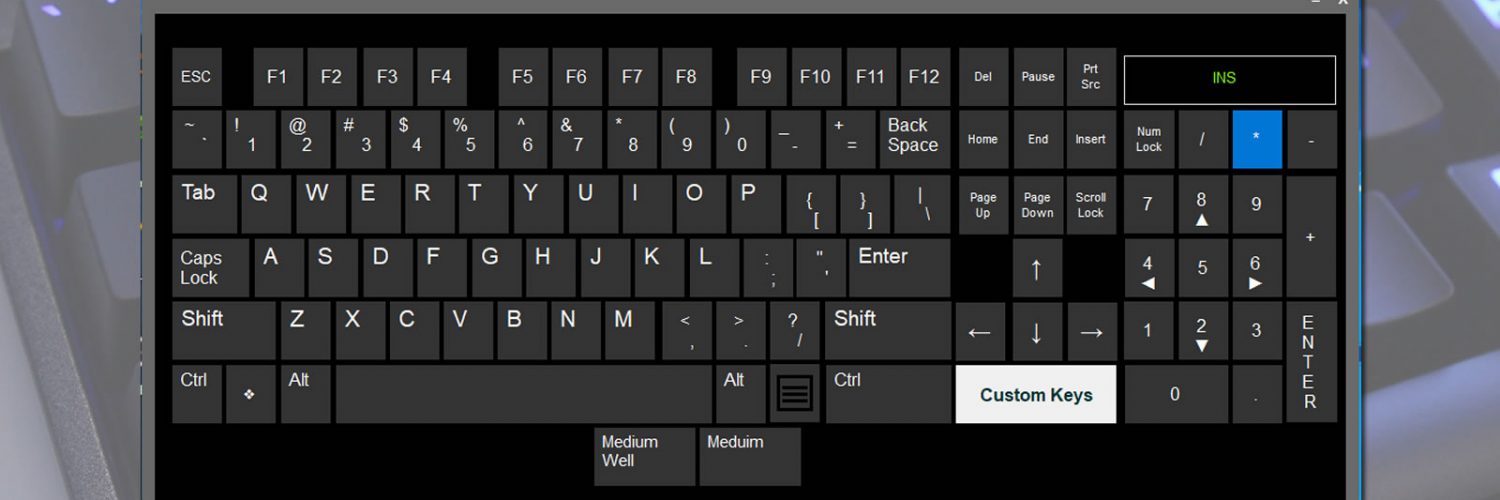
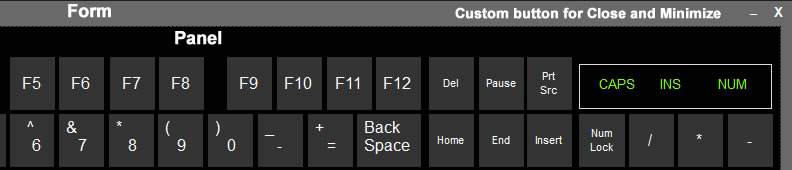
Planning the keyboard layout
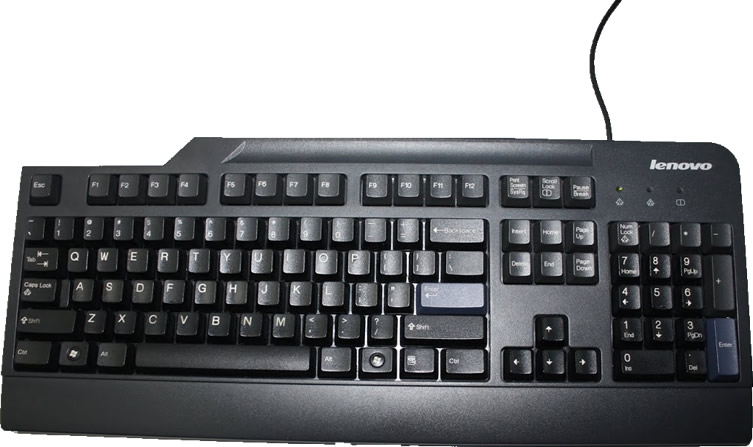
I decided to go by the layout of my physical keyboard:
I opened a new C# Winforms with the Dot Net framework project in Visual Studio.
I added my keys, according to the physical keyboard layout:

For the majority of the keys, you can use a button control, except for these special keys, which need to be CheckBox controls:
CAPSLOCK
SHIFT
CTRL
ALT
NUM LOCK
So, when the CAPSLOCK key is in the on mode, you have a checked CheckBox that identifies capital letters. CAPSLOCK off creates keystrokes for lowercase letters.
For keys with two characters, such as 2 (@) or 7 (&), we have to check the status of the SHIFT button and generate the proper keystroke accordingly.
SHIFT + 2 should send @ sign.
Similar situations apply to the combination keys such as CTRL + C (Copy), CTRL + P (Paste), and so on.

if (capslock.Checked || lshift.Checked || rshift.Checked)
			{
				SendKeys.Send("B");
				lshift.Checked = false;
				rshift.Checked = false;
			}
			else
			{
				SendKeys.Send("b");
			}
To identify when any of the checkboxes are in a checked state I use background color:
if (capslock.Checked == true)
			{
				capslock.BackColor = System.Drawing.ColorTranslator.FromHtml("#0076D7");
			}
			else
				capslock.BackColor = System.Drawing.ColorTranslator.FromHtml("#333333");
Custom Keys
Now that I have complete control of my onscreen keyboard, I want to add custom keys. Imagin Custom keys as a shortcut to send two or more characters in on keystroke.

Some more cosmetic details include adding a row with CAPS, Insert, and NUM LOCK key status. I change the visibility of the labels for CAPS and NUM depends on the On or Off status of the corresponding keys. I also added the code to change the background color of the keys as you hover the mouse over them.

this.button19.BackColor = System.Drawing.Color.FromArgb(((int)(((byte)(51)))), ((int)(((byte)(51)))), ((int)(((byte)(51)))));
			this.button19.Cursor = System.Windows.Forms.Cursors.Hand;
			this.button19.FlatAppearance.BorderSize = 0;
			this.button19.FlatAppearance.MouseDownBackColor = System.Drawing.Color.FromArgb(((int)(((byte)(0)))), ((int)(((byte)(118)))), ((int)(((byte)(215)))));
			this.button19.FlatAppearance.MouseOverBackColor = System.Drawing.Color.FromArgb(((int)(((byte)(0)))), ((int)(((byte)(118)))), ((int)(((byte)(215)))));
			this.button19.FlatStyle = System.Windows.Forms.FlatStyle.Flat;
			this.button19.Font = new System.Drawing.Font("Arial", 15.75F, System.Drawing.FontStyle.Regular, System.Drawing.GraphicsUnit.Point, ((byte)(0)));
			this.button19.ForeColor = System.Drawing.Color.White;
			this.button19.Location = new System.Drawing.Point(525, 147);
			this.button19.Margin = new System.Windows.Forms.Padding(2);
			this.button19.Name = "button19";
			this.button19.Size = new System.Drawing.Size(45, 53);
			this.button19.TabIndex = 17;
			this.button19.Text = "P";
			this.button19.TextAlign = System.Drawing.ContentAlignment.TopLeft;
			this.button19.UseVisualStyleBackColor = false;
			this.button19.Click += new System.EventHandler(this.button19_Click);
Border Style Issue
With Winforms, your keyboard is going to have a standard issued Windows border.

If you select the None option from your form properties for the FormBorderStyle, you will not be able to move your keyboard around the screen and change its position.
If you don’t mind the standard Windows border, you can choose an option that best fits your taste and usage of your keyboard.
I wanted to get rid of the border and have my border style. So this is what I have done:
1- I set the FormBorderStyle to None
2- Placed all my keys to a panel, which is sitting on the main form.
3- Changed the form’s background color to create a contrast with the panel’s background color.
Now I have my colors and make-shift border, but How can I move my onscreen keyboard?
The trick here requires a Win32 API:
[DllImportAttribute("user32.dll")]
		public static extern int SendMessage(IntPtr hWnd,
						 int Msg, int wParam, int lParam);
		[DllImportAttribute("user32.dll")]
		public static extern bool ReleaseCapture();
private void Form1_MouseDown(object sender, MouseEventArgs e)
{
if (e.Button == MouseButtons.Left)
{
ReleaseCapture();
SendMessage(Handle, WM_NCLBUTTONDOWN, HT_CAPTION, 0);
}
}Voila!
I have an onscreen keyboard with customized background and border style, which I can move around the screen and add custom keys to it.
Last Words,
You can take this onscreen keyboard as far as you wish and customize it with your ideas.